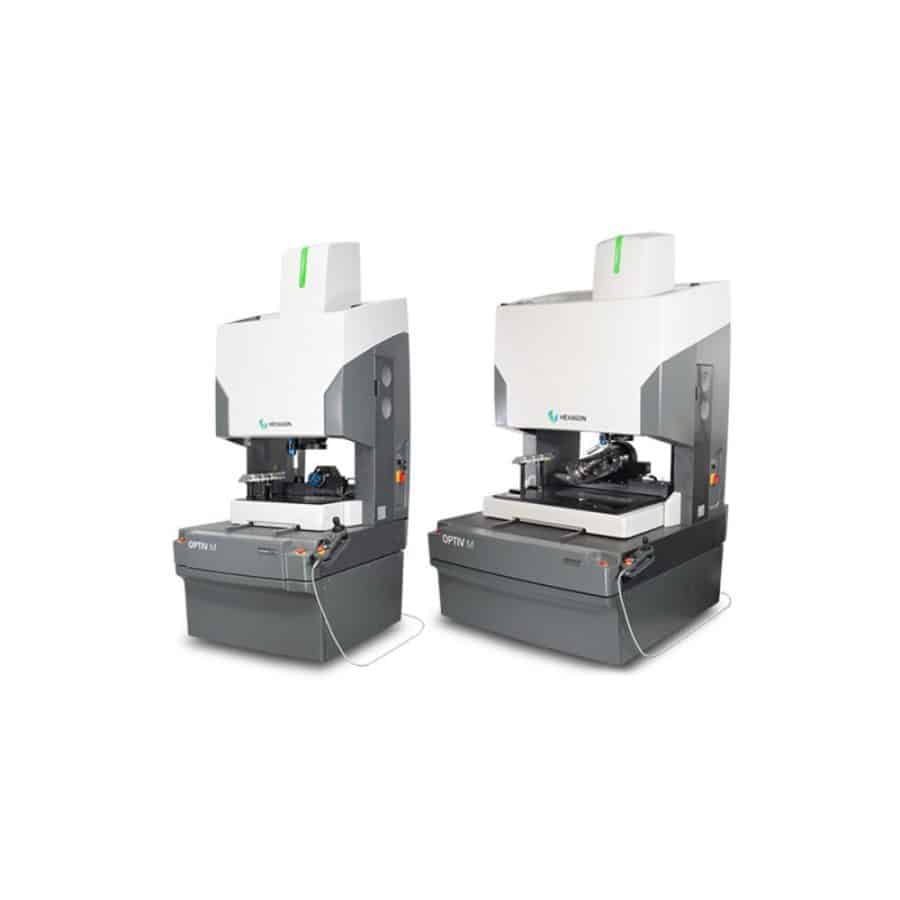
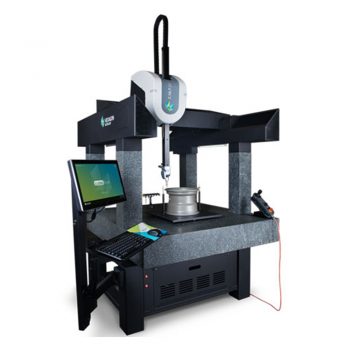
OPTIV M 4.4.3 and 6.6.4
Multisensor versatility optimised for individual applications
The OPTIV M 4.4.3 and OPTIV M 6.6.4 multisensor and optical coordinate measuring machines (CMM) draw on the strength of Hexagon’s Enhanced Productivity Series (EPS) to provide manufacturers of precision parts with a range of preconfigured EPS packages optimised for their individual applications and production targets.
On top of satisfying demand for a multisensor CMM tailored for today’s applications, the OPTIV M 4.4.3 and OPTIV M 6.6.4 are designed to adapt readily to future smart technologies and changing production requirements.
The flexible OPTIV M preconfigurations are future-ready, enabling manufacturers to easily expand their application capabilities with field installable upgrade kits. In addition to the EPS packages configured for flexibility, throughput, precision or shop-floor capability, Hexagon offers customised versions of the OPTIV M 4.4.3 and OPTIV M 6.6.4.
OPTIV M 4.4.3 and OPTIV M 6.6.4 deploy the full capabilities of Hexagon’s OPTIV Dual technology. OPTIV Dual consists of three technologies purpose-built for multisensor operations, enabling users to drive productivity by reducing cycle times, enhancing application flexibility and increasing accuracy.
High-speed measurement
The OPTIV M 4.4.3 and 6.6.4 are optimised for high-speed measurement, with features including a low-vibration granite construction that allows for high axis speeds and acceleration. The OPTIV Dual Z design is available as an option to reduce setup and inspection times by mounting tactile and optical sensors on two independent vertical axes.
Accuracy
Designed to ensure high levels of accuracy, the OPTIV M 4.4.3 and 6.6.4 incorporate precision recirculating ball bearing guides on all axes, an incremental, optoelectronic length measuring system with a resolution in the nanometre range and parametric temperature compensation, which provides temperature stability. Active vibration dampers are available as an option.
Robust, reliable design
A fixed bridge design with a moving measuring table and an integral base frame combine to ensure the stability and robustness of the OPTIV M 4.4.3 and 6.6.4.
Full range of multisensor capabilities
The OPTIV M 4.4.3 and 6.6.4 work with a full range of sensors to deliver high speed measurement, accuracy and versatility. They each come with a vision sensor with a high-resolution digital CMOS colour camera and a programmable 10x motorised zoom lens. Variable illumination enables the high contrast illumination of complex surfaces and edges, through the use of a coaxial LED top light, a telecentric LED back light and a multi-segment LED ring light. Further sensor options include a high-resolution digital CMOS monochrome camera, a fixed focal length dual camera optics (OPTIV Dual Camera) with changeable lenses, the off-axis laser triangulation sensor OPTIV LTS, a chromatic white light sensor (CWS), a touch-trigger probe HP-TM and a stylus module changer rack HR-MP with up to six ports, a scanning probe HP-S-X1 and a styli changer rack HR-X with up to nine ports, as well as the motorised indexing probe head HH-A-T51). An optional rotary indexing table2) can be used to automatically reveal hidden features to sensors whereas optional CNC rotary tables or CNC stacked rotary tables (OPTIV Dual Rotary)3) enable referencing of measurements between features from different rotational positions without realignment of the workpiece. Automation integration kits with I/O boxes enable the integration of both CMMs into individual automation environments and are also available as options.
Ease of use
PC-DMIS metrology software provides intuitively easy workflows that drive higher throughput and smarter data capture. Features include full range of scanning methods, comprehensive CAD support including automatic measurement routine creation and extensive offline programming capabilities. Inspect meanwhile makes it simple to select and execute routines in a shop-floor production environment. Inspect Slideshow is available as an option to help production-level CMM operators immediately identify and resolve manufacturing defects with graphical real-time feedback on custom key dimensions. And Inspect Pallet provides a simple interface for configuring a pallet or measuring a batch of parts.
Data analysis
Q-DAS software delivers powerful statistical analysis of product and process data, including SPC and real-time visualisation of measurement data, measurement system analysis and process capability analysis.
Real-time environmental monitoring for metrology environments
PULSE uses a network of sensors to record variations in temperature, vibration and humidity in the vicinity of your CMM. PULSE also offers equipment status alerts and crash notifications.
Factory asset management
The OPTIV M 4.4.3 and 6.6.4 come with HxGN SFx | Asset Management software ready to activate. It provides real-time reports on the CMM’s performance, status and use, remotely or on-site, all from a user-friendly dashboard.
1) Only for OPTIV M 4.4.3 and OPTIV M 6.6.4 Dual Z models
2) Only for OPTIV M 4.4.3
3) Only for OPTIV M 6.6.4 Dual Z model


